How To Measure For Island House StAndard Finishing options
Written by: JoAnn Gardella
Published: 11/7/22
Before your begin - A quick note about marking your canvas
When making marks on your canvas to indicate your stitched area please use a permanent archival ink pen. The pen should be as thin as possible to leave a visible mark and the color should be as close as available to the background color, this will minimize the possibility of the mark showing through your finished work. This is especially critical when marking for a white or open background
We suggest an 0.5 Micron pen or similar. Please do not use a large black Sharpie, the ink tends to bleed onto our needle and into your fibers as we stitch through the edge during finishing.
My personal method is to make my corner marks outside of the area to be stitched and use my fiber along the rows and columns to ensure I am inside of the stitched area.
HOW TO MEASURE YOUR NEEDLEPOINT CANVAS
FOR ISLAND HOUSE STANDARD FINISHING OPTIONS
In order to take advantage of Island House Needlepoint’s standard fishing options, the stitched areas of your needlepoint canvas needs to have very specific dimensions. This post details the method for using a ruler to measure your canvas / stitching to ensure your finished work will comply with required dimensions.
Painted needlepoint canvases reflect the artist’s vision; slight modifications to the canvas/design may be required to conform to the required standard finishing dimensions. Please be aware that for a myriad of reasons advertised canvas dimensions may vary from the actual measured dimensions (we have seen +/- 1/4”). Our standard acrylic products are tightly toleranced, which allows us to ensure your finished piece is of the highest quality and will look stunning for years to come. To finish your needlepoint into these standard acrylic pieces requires similar tolerance-ing of the stitched area.
We recommend measuring your canvas prior to beginning stitching, this allows you to plan for any modifications that may be required. For canvases stitched in hand, measurements should be verified upon completion of stitching, prior submitting your canvas for finishing, tension of your stitching may have caused the canvas to go out of tolerance.
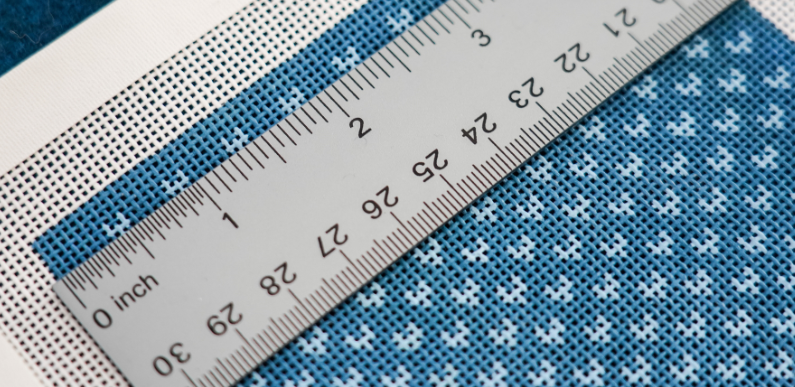
Measurement should be made using a standard ruler (metal or sturdy plastic). When aligning your ruler to the starting point please be sure you are using the “zero mark” on your ruler. For most standard rulers the “zero mark” is not typically “the end of the ruler”.
In the photograph, Figure 1., notice how the ruler is lined up at the first line on the ruler (zero), not the edge of the ruler.
Where it counts
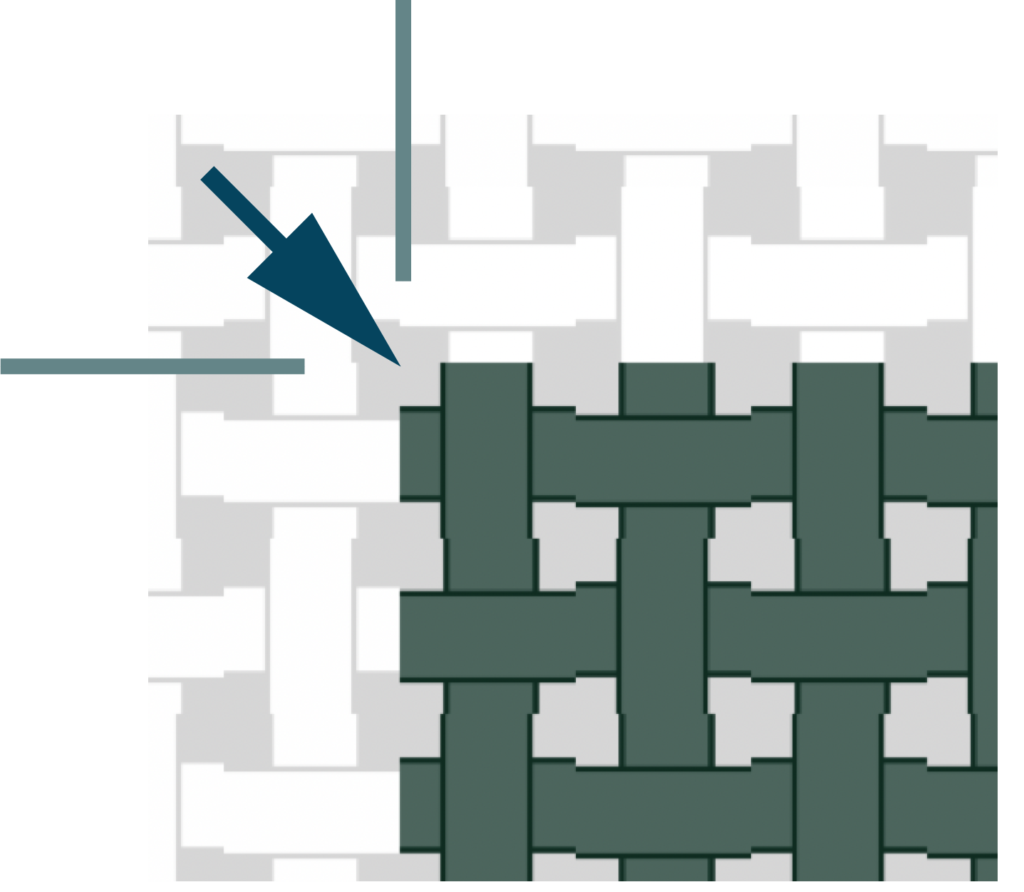
Referring to figure two, start your measurement by aligning the zero mark of your ruler to the center of the outside canvas hole (blue arrow). The aqua lines indicate the start point of your measurement in the horizontal and vertical orientations.
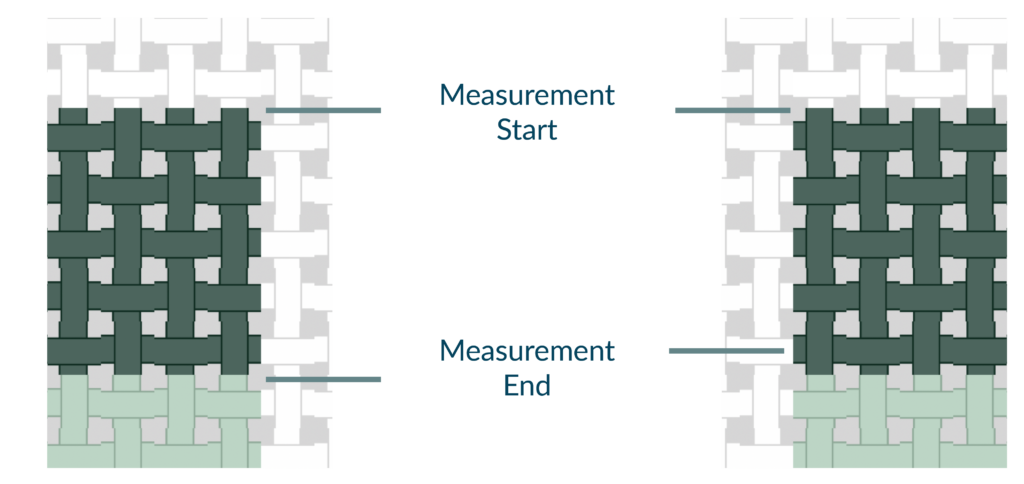
Place a mark on the canvas at the required measured dimension. The aqua lines in figure three show two different measured dimension marks (in the vertical orientation).
If your measured dimension mark falls between two canvas threads, stitch up to the line. This measurement is shown in the left frame of figure three. In this example you would stitch all of the green area.
If your measured dimension mark falls on top of a canvas thread, include a stitch over that thread. This measurement example is shown in the right from of figure three. In this example you would stitch all of the green area.